Quick Start Guide
Edit on GitHubThis page is for all new Equalify users. Whether you are a product owner looking for accessibility insights or a developer looking to embed accessibility into your practice, this page will help you get started with Equalify's platform, covering how to create an account and access the platform.
Access & Onboarding
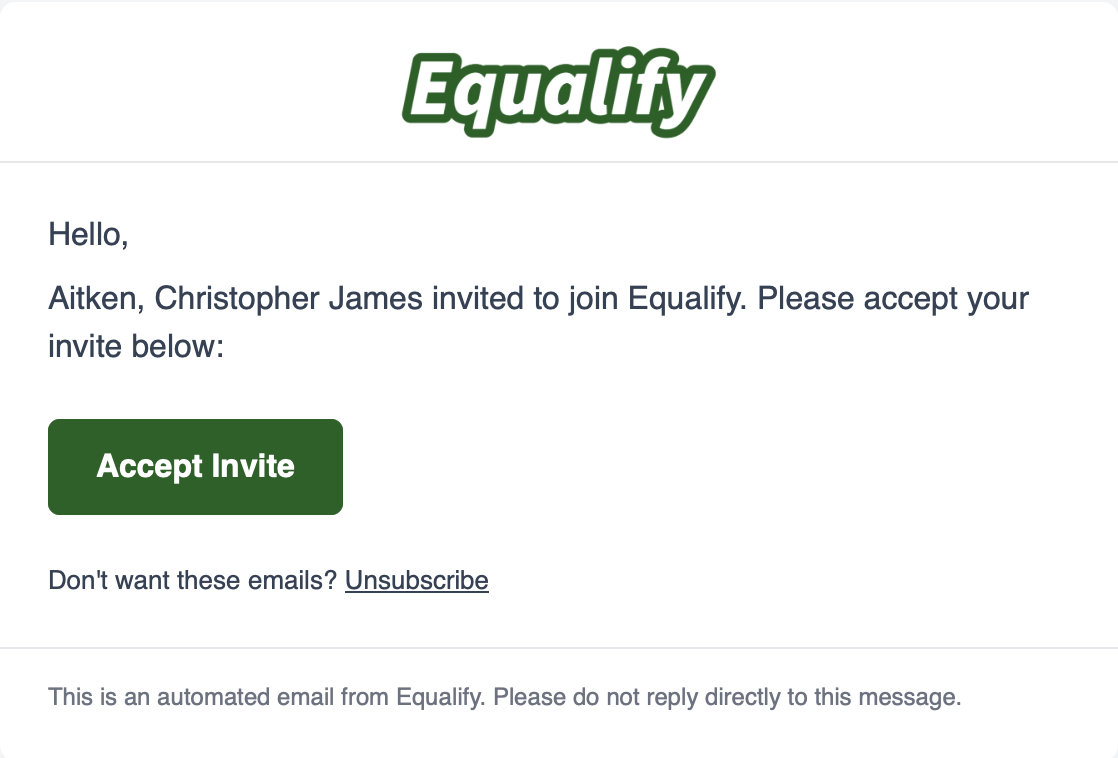
Email invite
Once added by an Admin, you will receive an email from noreply@equalify.uic.edu with the subject "You are invited to join Equalify".From the email invite, select "Accept Invite" to be redirected to the Equalify sign-in page.
💡Tip: Managing a workspace’s access? See the 🔗”Manage User Access”.md) page for more information about adding users to your team.
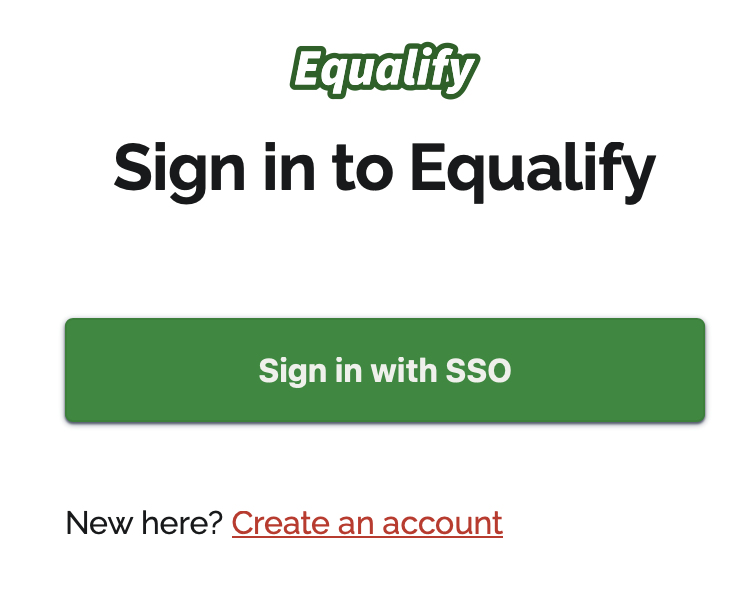
Logging in
Depending on how your organization manages Equalify you can sign in using Single Sign-On (SSO) or Create a New Account, via the Sign Up for Equalify form.Using SSO to Log In
If your organization has set up SSO for Equalify, select "Sign in with SSO", and log in using your existing credentials.⚠️Important: You must have previously received an invitation to join Equalify for SSO to work.
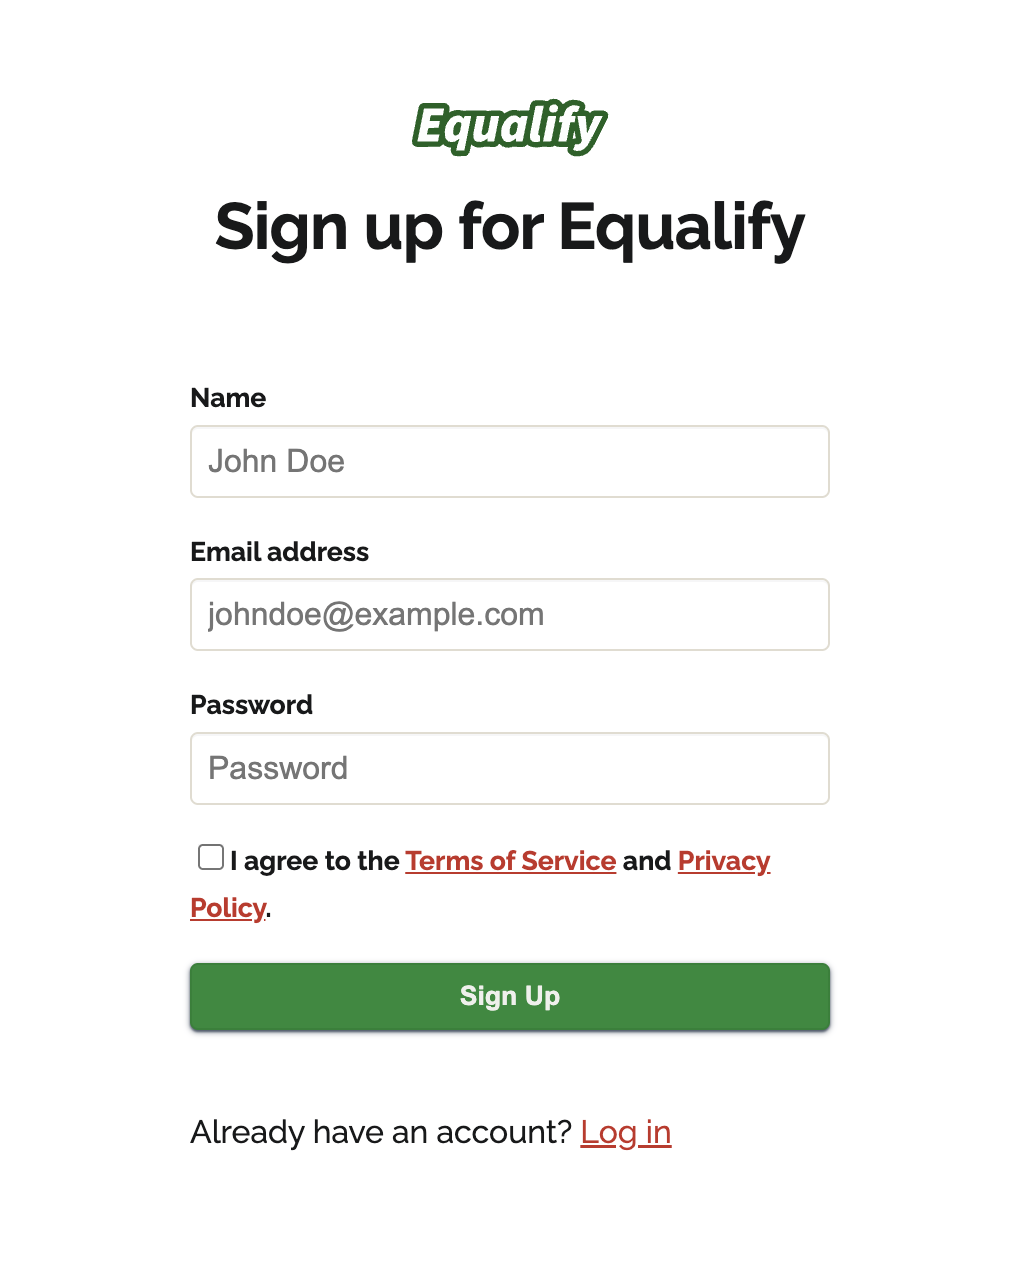
Creating a new account without SSO
If your organization does not have SSO set up for Equalify, you will be asked to create a password, which you will then use (along with your email) to log in.From the email: Select “Create an Account” and fill in your details. You must use the same email address that the invite was sent to.
💡Tip: Unsure if SSO is active for your organization? Ask your Equalify administrator for help.
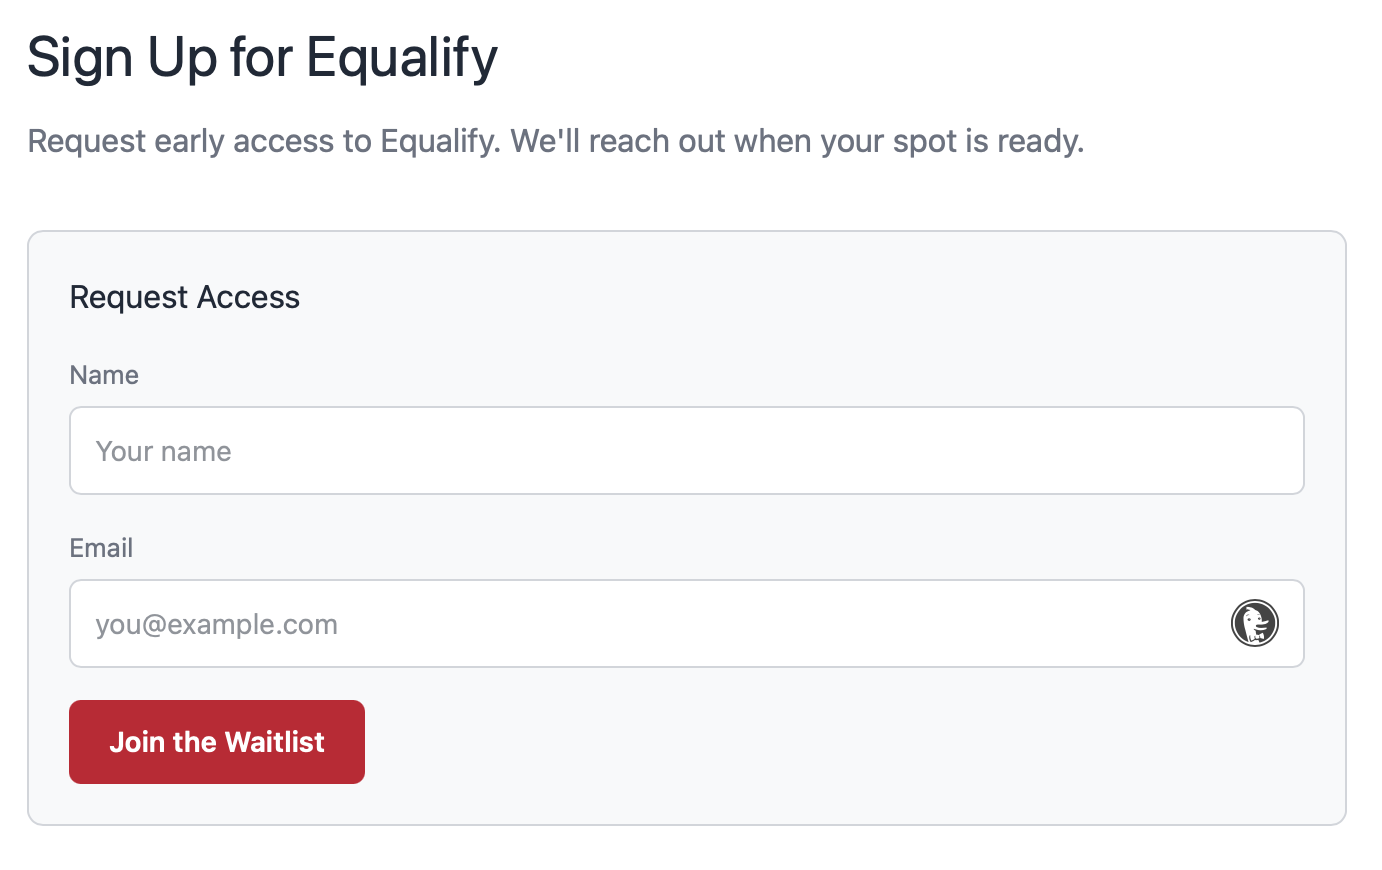
Sign Up via Waitlist
Currently, Equalify is invite-only available only to Equalify partners. In the future, the "Create an account" option will be widely available. Everyone interested is welcome to join the early access waitlist: https://equalify.uic.edu/signup